

In word processing, a paragraph that has all lines but the first indented. A hanging indent is also known as a hanging paragraph. With many word processors, you can create hanging indents by specifying a negative indentation for the first line of each paragraph.
In Other ways, A hanging indent is essentially the opposite of the common indent you’re used to seeing most of the time.
Unlike an ordinary indent – in which the first line of a paragraph is set to the right and the rest of the text returns to the left margin – a hanging indent leaves the first line at the left margin, and then indents all the following lines in the paragraph.
It’s a style commonly used for bibliographies and “works cited” pages in MLA format, and sometimes for creating lists within documents.
You can insert a hanging indent in nearly every word processor, including Google Docs.
How to make a hanging indent on a Google doc
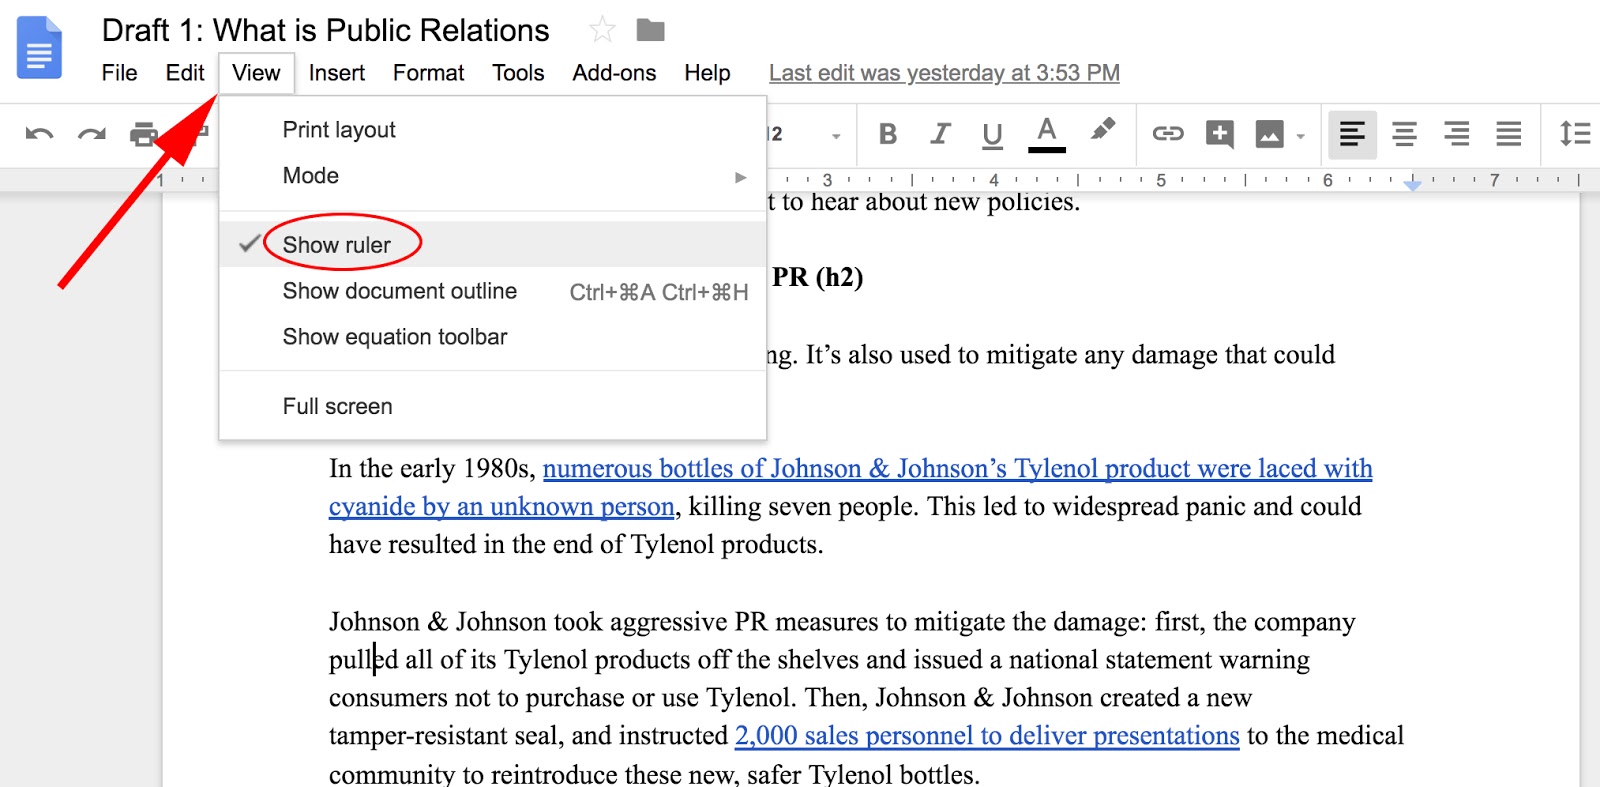
To create a hanging indent in Google Docs, you’ll need to first make sure your ruler is visible. A ruler is the measurement tool at the top of your Doc, used to help align text, graphics, tables, and other elements. To make your ruler visible, simply click “View” in your navigation bar, and make sure “Show Ruler” is checked.
Now that your ruler is visible, you’re ready to create a hanging indent.
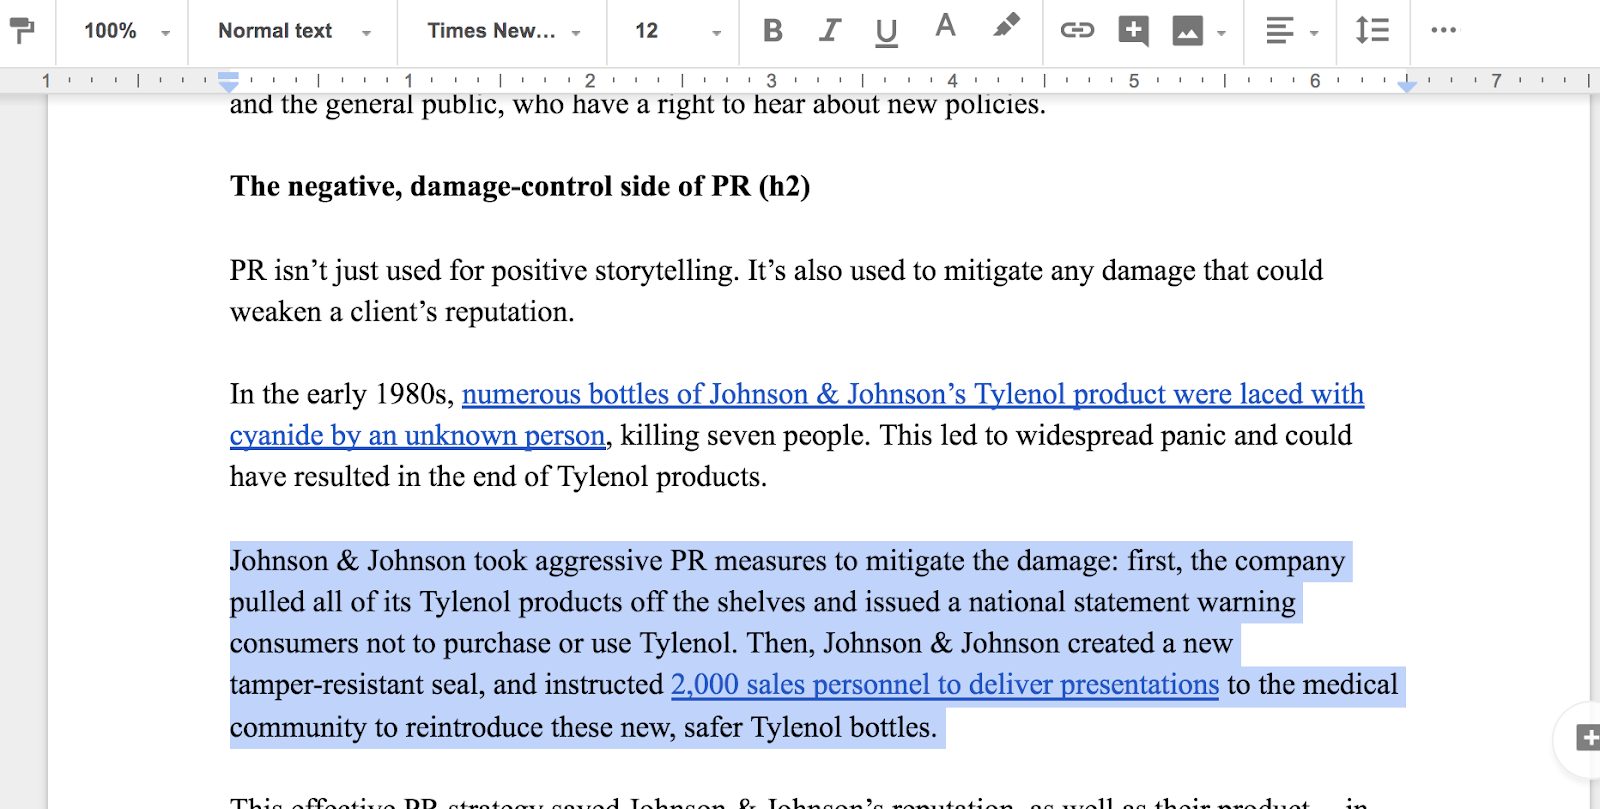
1. First, select the text you want to indent. You can highlight one or multiple paragraphs.
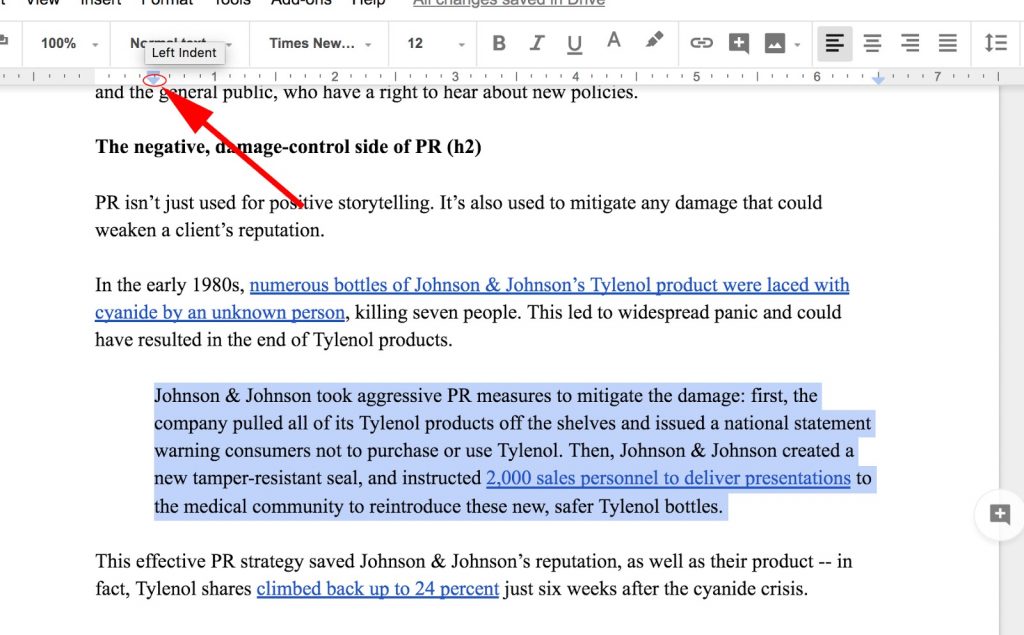 3. Now, drag the First Line Indent marker (the light blue rectangle) back to the left margin.
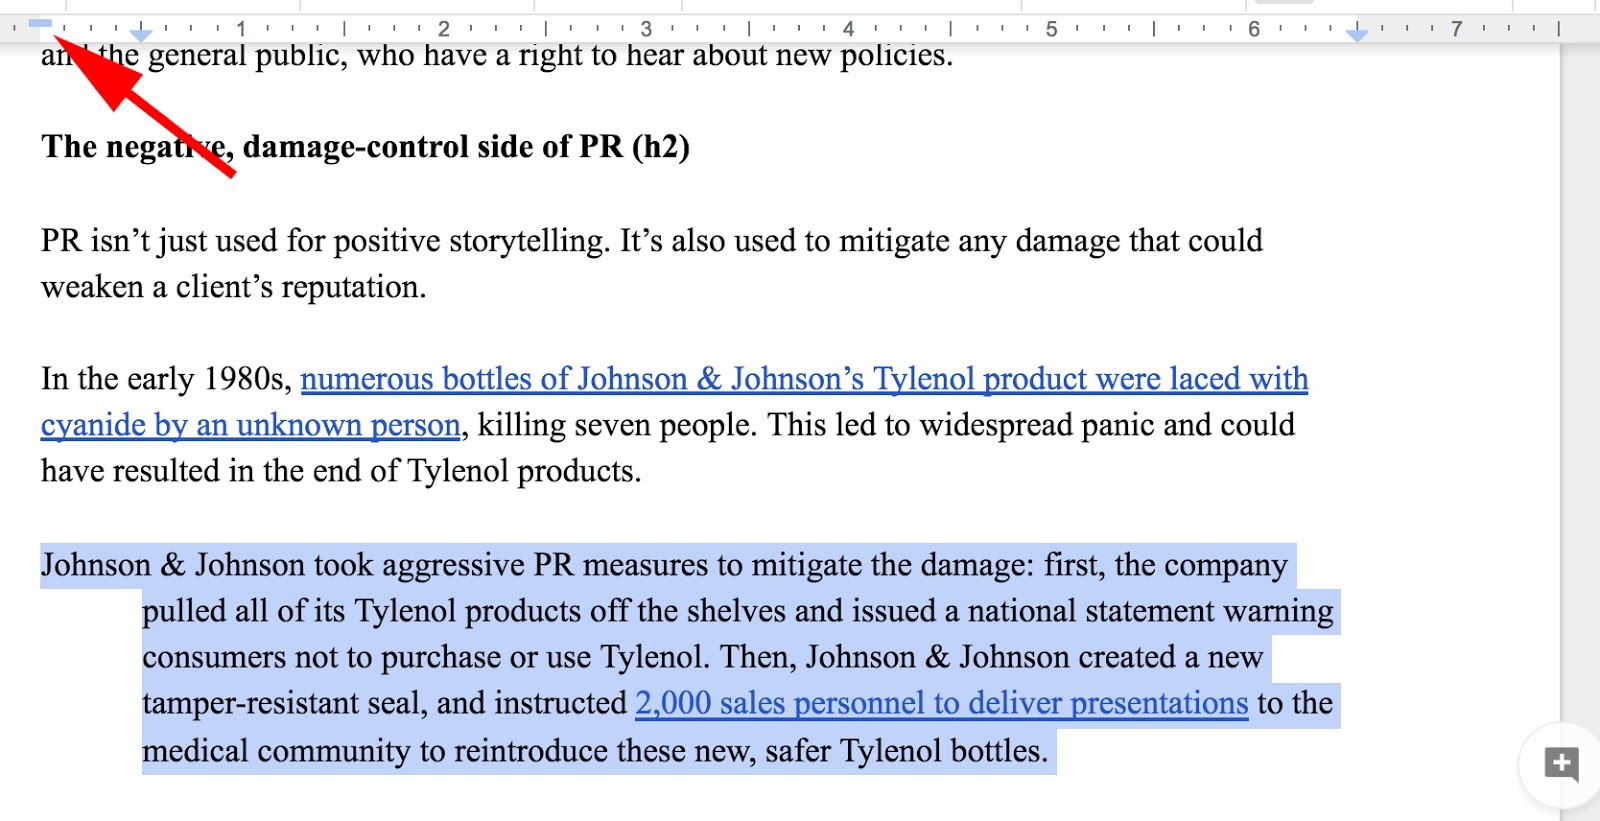
How to make a hanging indent on a Microsoft Word
I suggest writing out your entire bibliography, highlighting it all at once, and then following the above 6 steps. Easy-peasy.
If you’re more of a visual person, following are screenshots of each step.
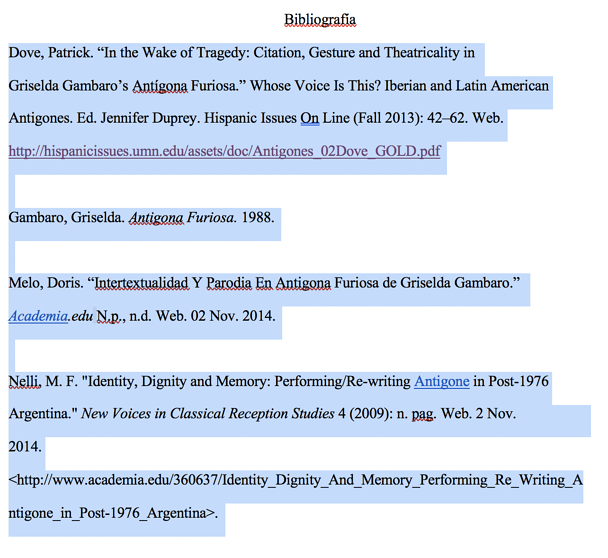
1. Highlight your entire citation
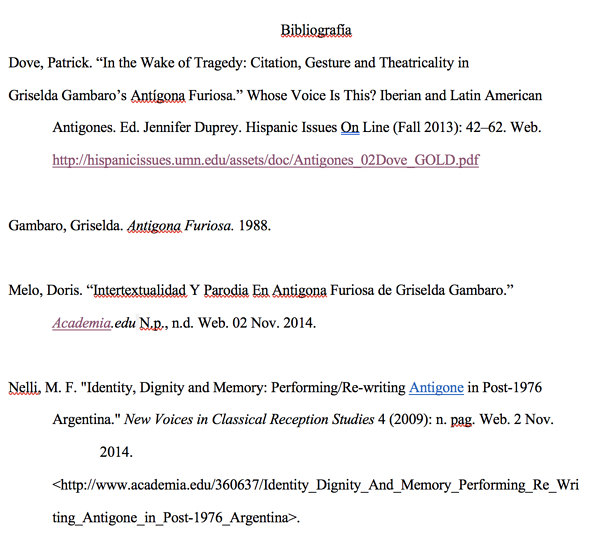
Here’s a version of a bibliography I created for an old Spanish essay (it still needed edits at this time, don’t judge me).
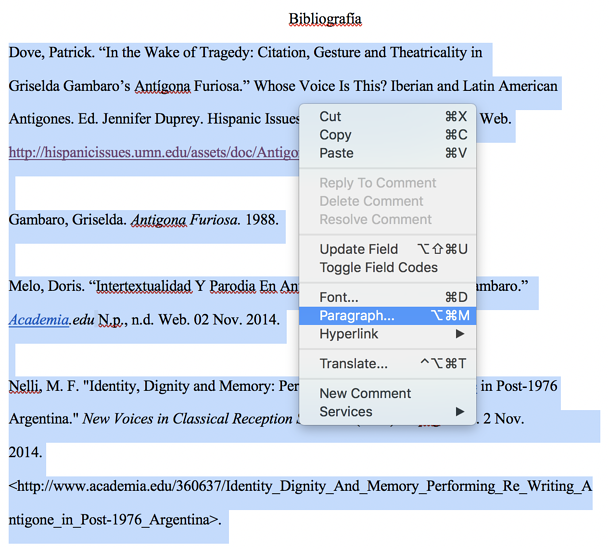
2. Right-click your mouse
Or if you’re using a Mac laptop, press ⌘+ctrl+mouse click.
3. Select ‘Paragraph’
In the menu that appears after you have clicked, select ‘Paragraph’ about two-thirds of the way down.
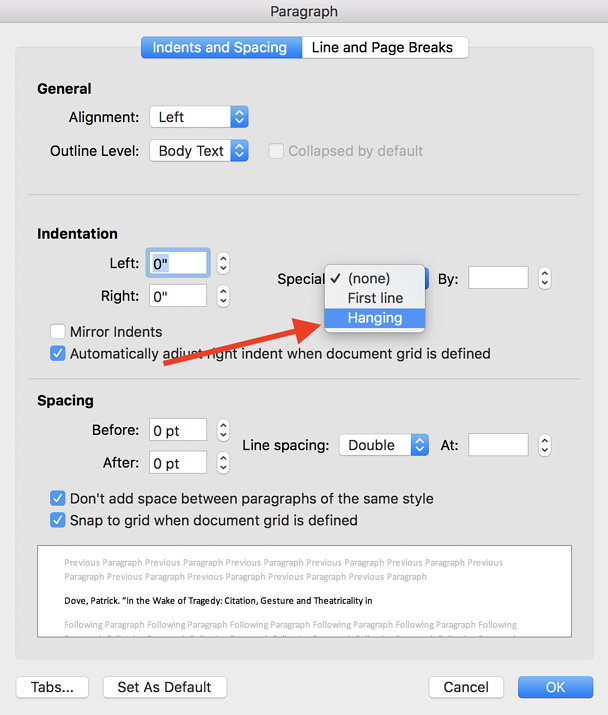
4. Under ‘Indentation,’ in the ‘Special:’ field select ‘Hanging’
In the pop-up window that appears, look to the fields under ‘Indentation.’ In the ‘Special:’ field, select ‘Hanging’ from the drop-down menu.
5. Enter .5” in ‘By:’ field
Sometimes, after you select ‘Hanging’ the ‘By:’ field will automatically populate with .5″. If not, fill it in.
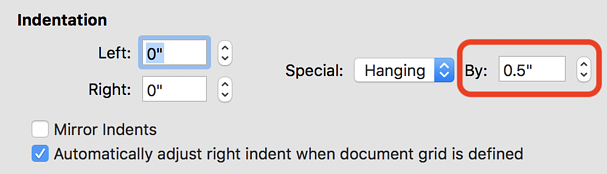
6. Hit ‘OK’
Afterward, your bibliography should look like this!


Comments