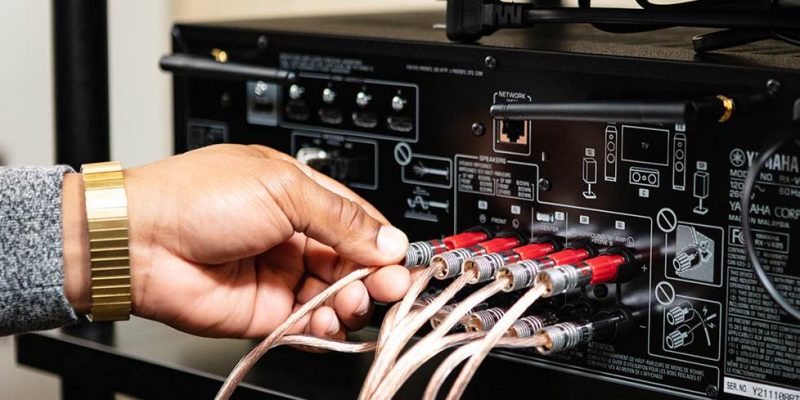
When it comes to cables, you might only be familiar with pre-terminated cables that come ready to plug in. However, for hi-fi surround sound systems, there is another option. Many people opt to manually wire the speakers in their sound system. This can be beneficial for more complex or dedicated speaker systems, like those in a home theater.
There are two main reasons why one would opt for DIY speaker cable for their hifi system:
Firstly, you can cut your cables to custom lengths. Pre-terminated cables are only available in specific common lengths, so you can end up with a bunch of extra cable that can be difficult to store or become messy. Manually wiring your speakers allows you to cut the exact lengths you need.
Additionally, if you have a system with many speakers, it can be cost-effective to get DIY speaker cable. Pre-terminated cables get expensive when you need lengths greater than ten meters, and if you have five, seven, or more speakers, this adds up quickly. You can get high quality wire at a much lower price by buying manual wire in bulk.
If you want to try manually wiring your speaker system, how do you start? The good news is, it’s not that complicated! This is everything you need to know:
Buying Wire
Before you make any purchases, you’ll need to measure and calculate the total length of cable you need for your system. It pays to be meticulous during this step, because poor measuring can lead to more headache later on. Don’t just use a rigid tape measure from point A to point B — cables are flexible. Use a flexible tape measure or a string to get an accurate measure of each connection you need to make. For each measurement, add a few extra inches just to be safe. It’s always better to have a cable that’s a little too long than a little too short.
After calculating your total, you’ll also need to choose the wire gauge, or AWG. The gauge is the thickness of the wire, and a higher gauge means a thinner wire. If you need extra long cables, such as over 20 meters, then you might want to opt for a lower AWG to ensure your signal is reliable. Otherwise, the gauge isn’t super important.
You can get DIY speaker cable from an audio supply store like Selby Acoustics either by length or by the roll. They will also have audio professionals who can answer any questions you might have.
Wire Cutting
Once you have all your wire, it’s time to cut! Always cut the longest pieces first. This way, if you made any errors in measuring you can minimize your waste. If you have a few inches short, it’s best to sacrifice a short cable than a long cable, because it will be much cheaper to order a pre-terminated replacement. If you are meticulous in measuring and cutting, you shouldn’t have any problems.
Wire Stripping
After you cut your cables, you can strip the ends of each connection. Since speaker wire comes in stereo, you will first need to separate the ends. Sometimes you can just pull the two cables apart, or you might have to use a box cutter. Be careful not to cut through the insulation when doing this. Separate the cables a couple inches from the end on each side.
Use a wire stripper to strip the insulation about 3/4 of an inch from the end. Always work with each wire individually. Once the bare wire is exposed, use your fingers to twist the ends into a consolidated point.
Terminals
At this point, you can simply attach your bare wire ends to your devices and call it a day. However you put all this work in to have an organized cabling system, so you should probably add terminals to your connections. Most people opt for banana plugs because they’re easy to install. Throwing some banana plugs on the ends of your cable will protect it from bending and help it last longer.


Comments